Set Up A LEGAL ENTITY
FOR E-Invoicing
If you’re creating an invoice in Coupa for the first time, you’ll need to add your legal business details first. The steps below will walk you through the process.
Get set up for e-Invoices
Before you can send any invoice, you’ll be prompted to set up e-Invoicing with Coupa. To complete that you can go into your Admin tab.

Step 1:
1. Click on “Setup” tab at the top of the page.
2. Click on “Legal Entity Setup” from the left side of the page.
3. Click on “Add Legal Entity” button on the upper right side of the page. Enter the following:
Legal Entity Name
Country
Hints are provided on the right of your Coupa screen.
Step 2:
Complete all the required fields with a red asterisk * and your Tax ID.
Note: If you do not want to use this address for your Remit-To then uncheck “Use this address for Remit-To” and you will be directed to add a different Remit-To Address as shown in Step 3a.
Click “Done”.

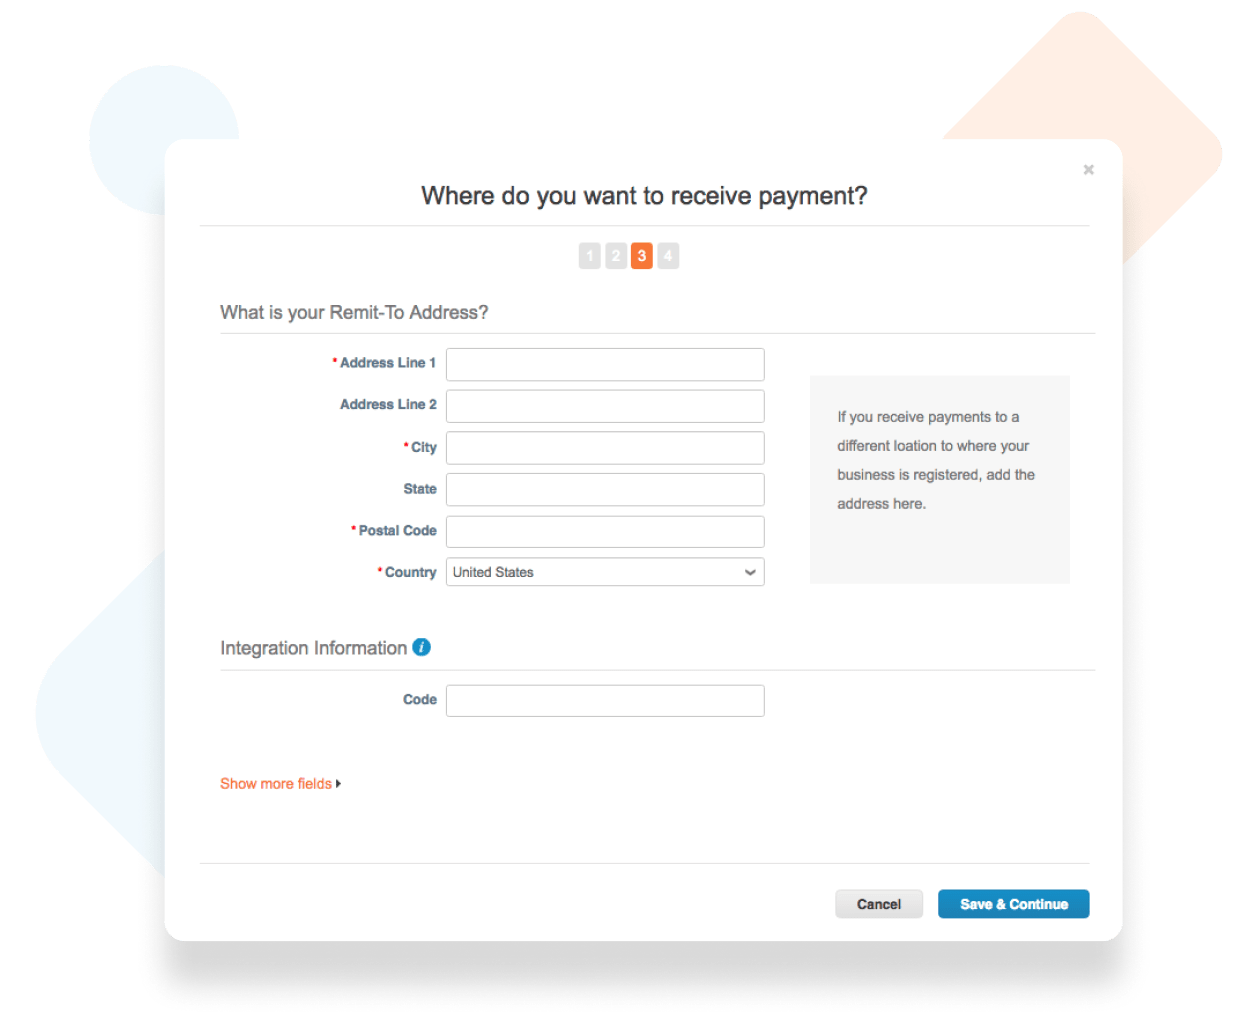
Step 3a:
If applicable, enter your Remit-To address.
Fill out the fields with a red asterisk * and any other required information.
If you are using the same address you entered in Step 2, that address will already be displayed here for you.
Click “Save & Continue”.
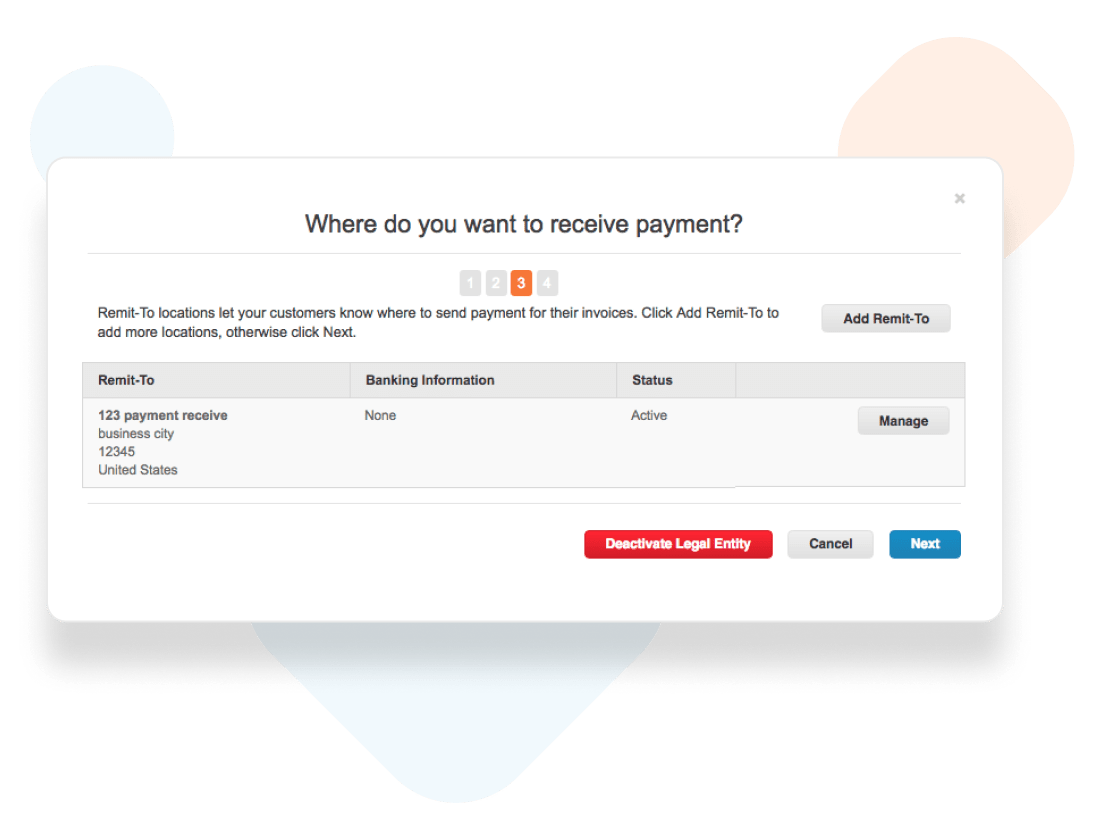
Step 3b:
If everything is correct, click “Next”.
If you need to edit anything, click “Manage”.
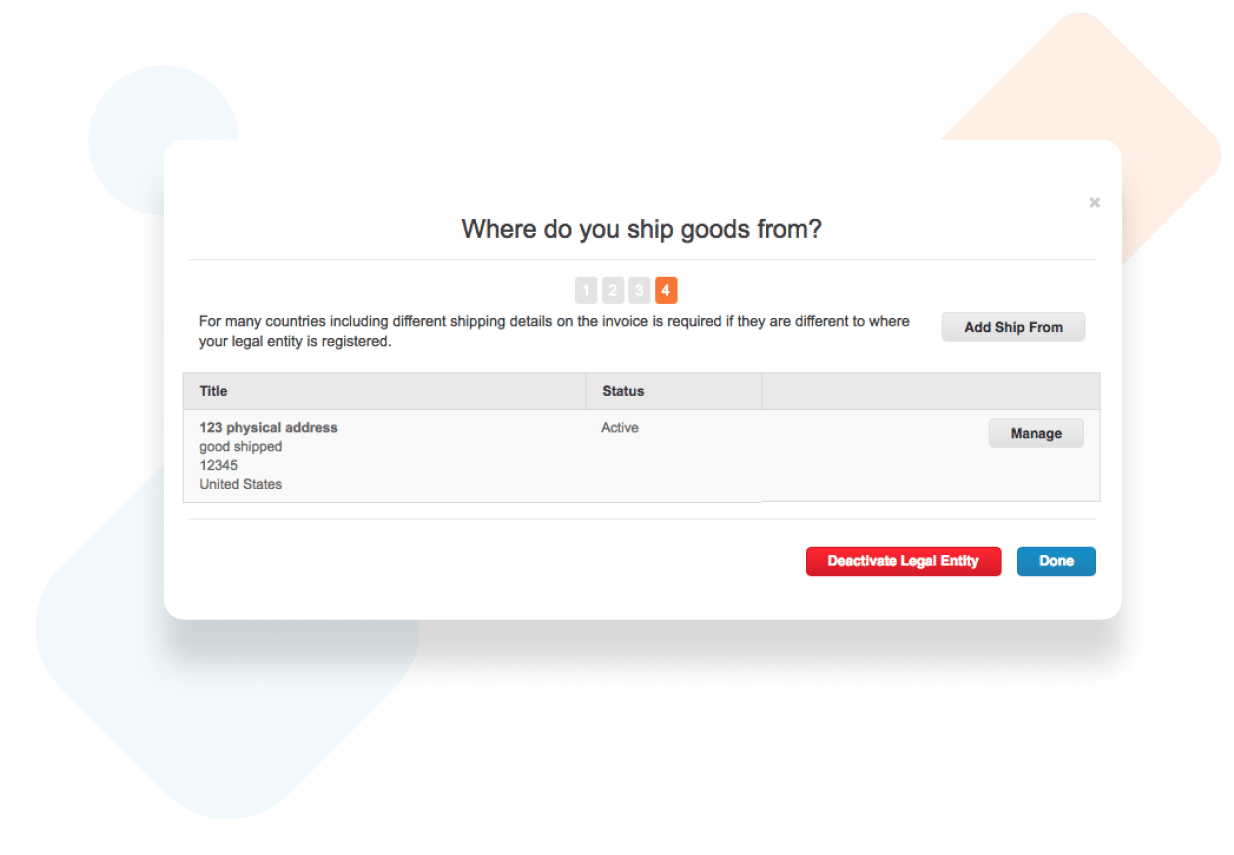
Step 4:
Review your Ship From address.
If everything is correct, click “Done” to complete your e-invoicing setup.