Creating an Invoice
or Credit Memo
Create an Invoice or Credit Memo
that are available to you are dependent on your Coupa customer’s settings.
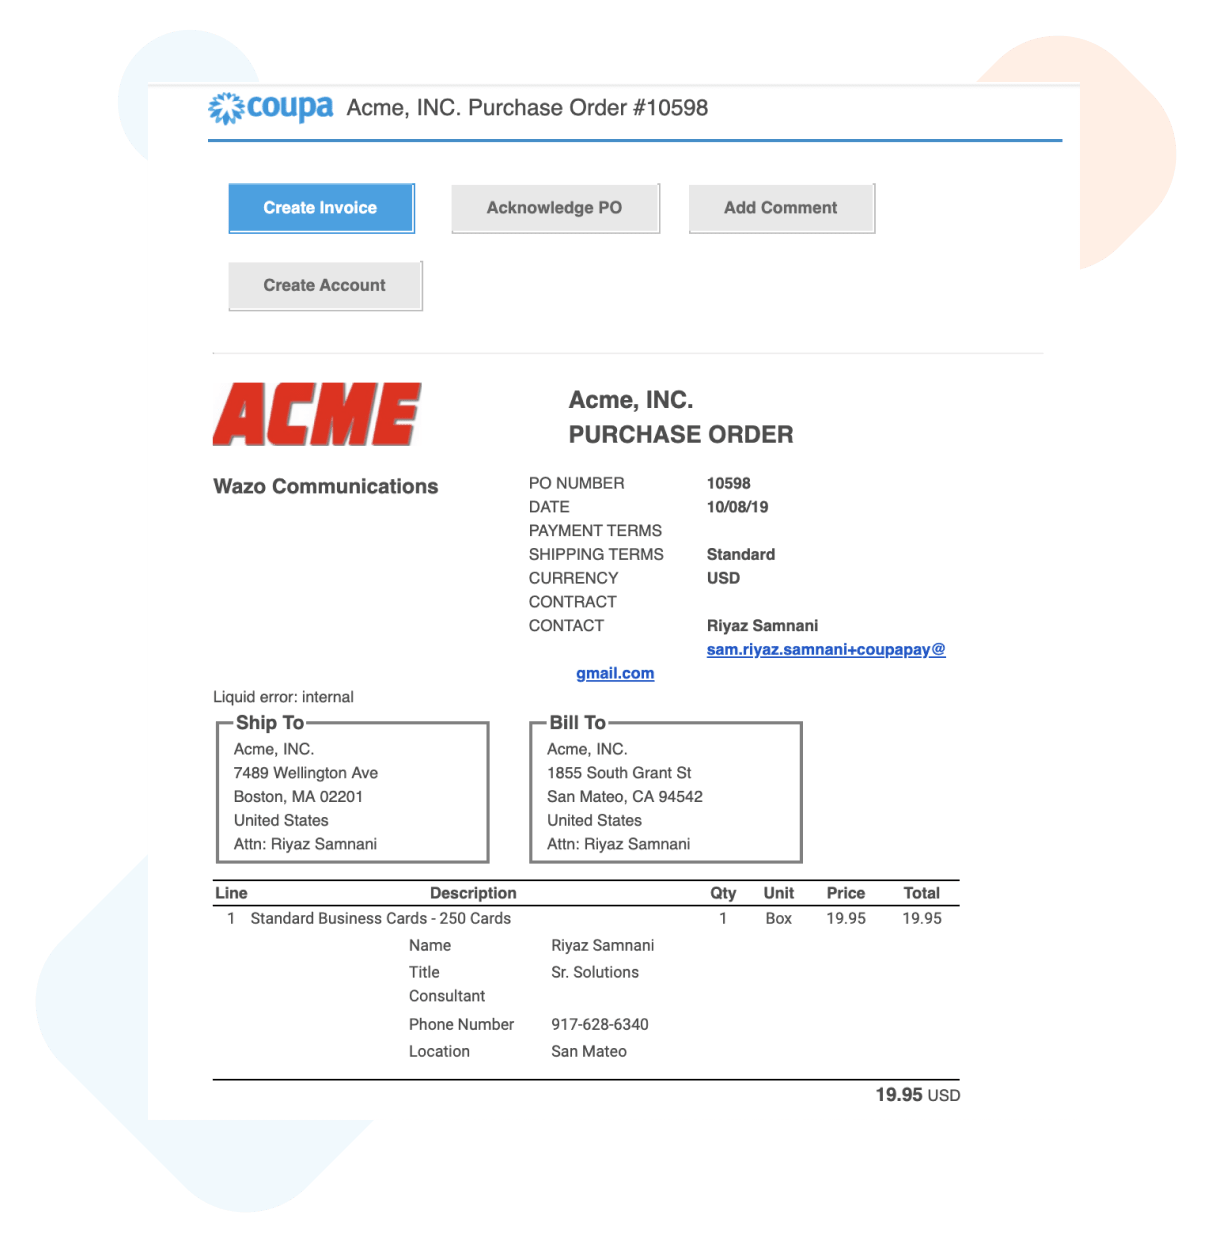
Via email OR Log in and Select PO
Note: Acknowledge PO simply notifies the Customer contact that you have come in contact/received the Purchase Order
Note: You will be asked to register for e-invoicing and create a Remit-To if you have not already.
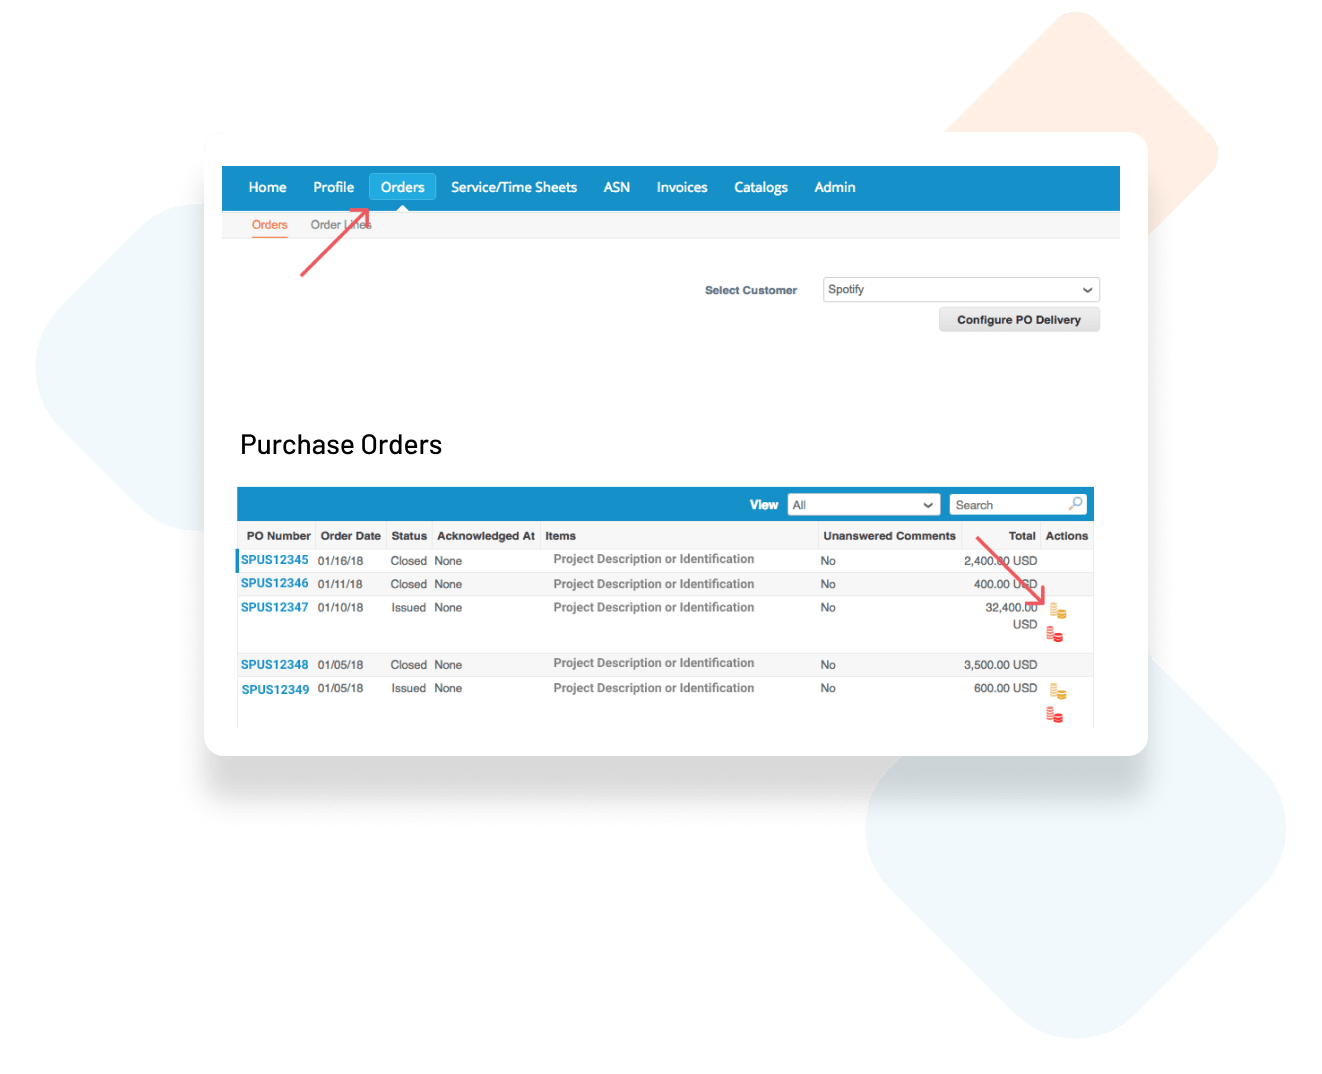
Log In and Select PO
Click on the Orders tab to view Purchase Orders (PO).
Find the PO you need to invoice against and click on the stack of gold coins to the right.
You can also click into the PO number to see the details first, and then select Create Invoice.
The Create Invoice page will appear.
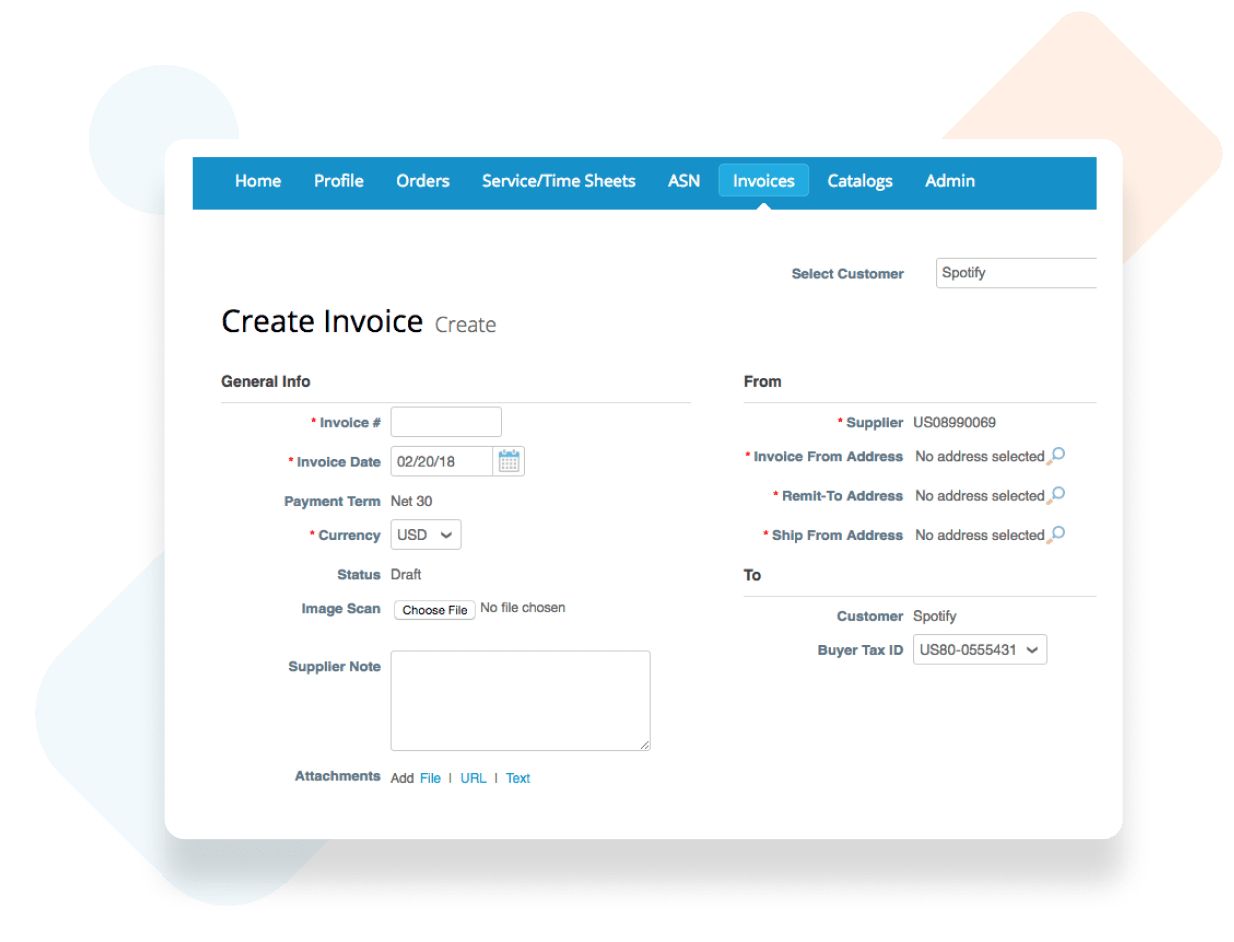
Fill Out the Form Fields
The invoice # must be unique and match the number in your attached invoice. Attach a PDF invoice with the Add File link by Attachments.
Notes:
– If a box exchange rate appears, enter today’s exchange rate.
– If the Invoice From Address, Remit-To Address, or Ship From Address do not appear, click the magnifying glass to select the respective addresses. If there is nothing to select, you have not completed the E-invoicing setup.
– If there are multiple invoices for a purchase order, they must be submitted separately.
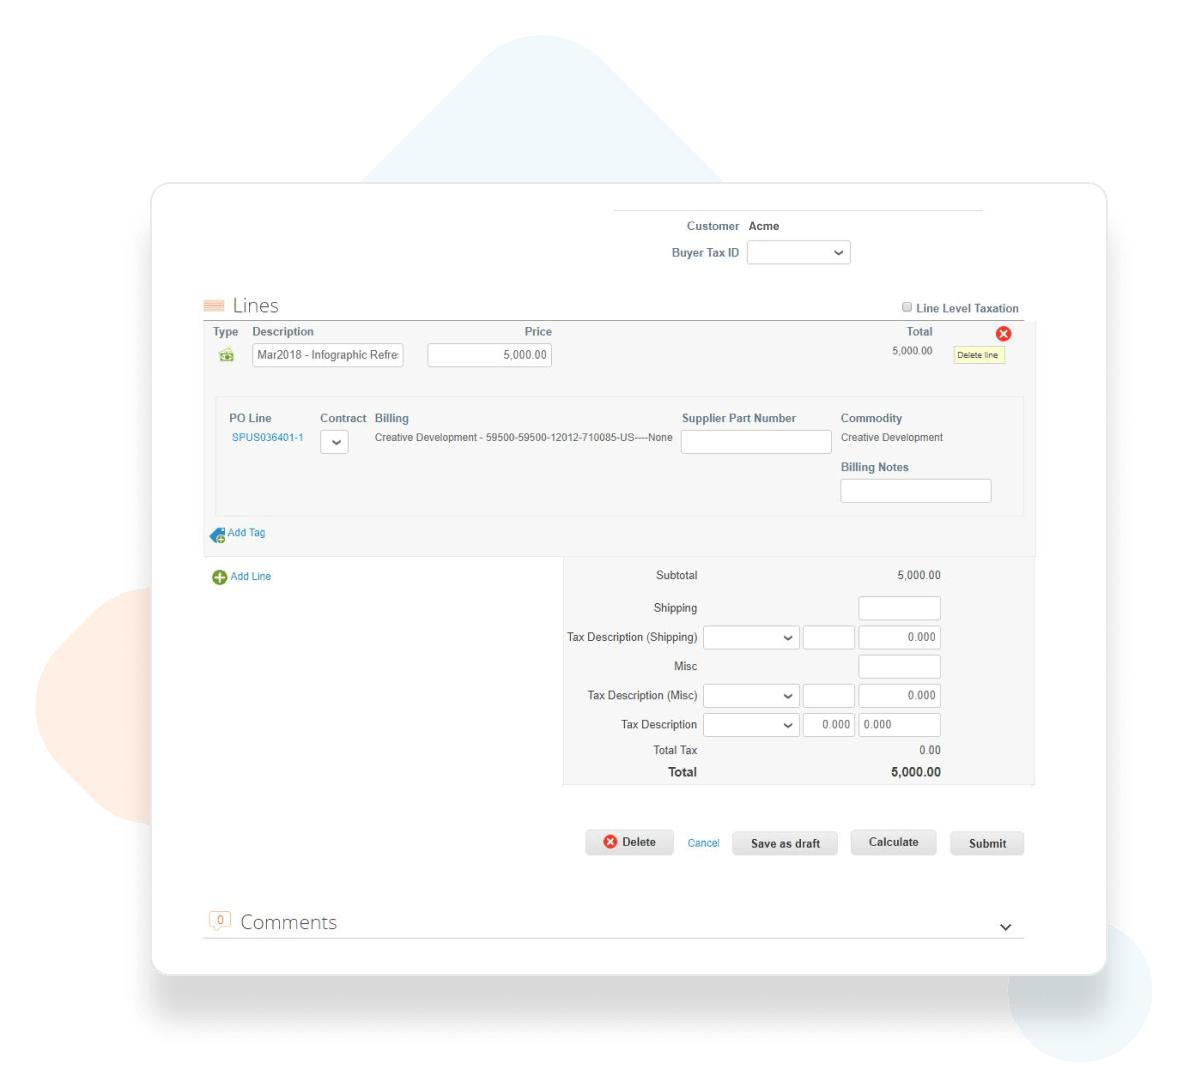
Add and Edit Purchase Order Lines
Example: A purchase order was created for the entire year by months and you are invoicing only for March, you will have to delete the other 11 lines to submit the invoice correctly.
If you need to input multiple lines into the invoice, fill out the info for the first line and then click the green plus sign to add a line. If needed, adjust the price to match the billing amount for each line.
Once you have entered each line item, click “Calculate” at the bottom to see the updated total for the lines. You can add Shipping and Handling charges below the item lines.
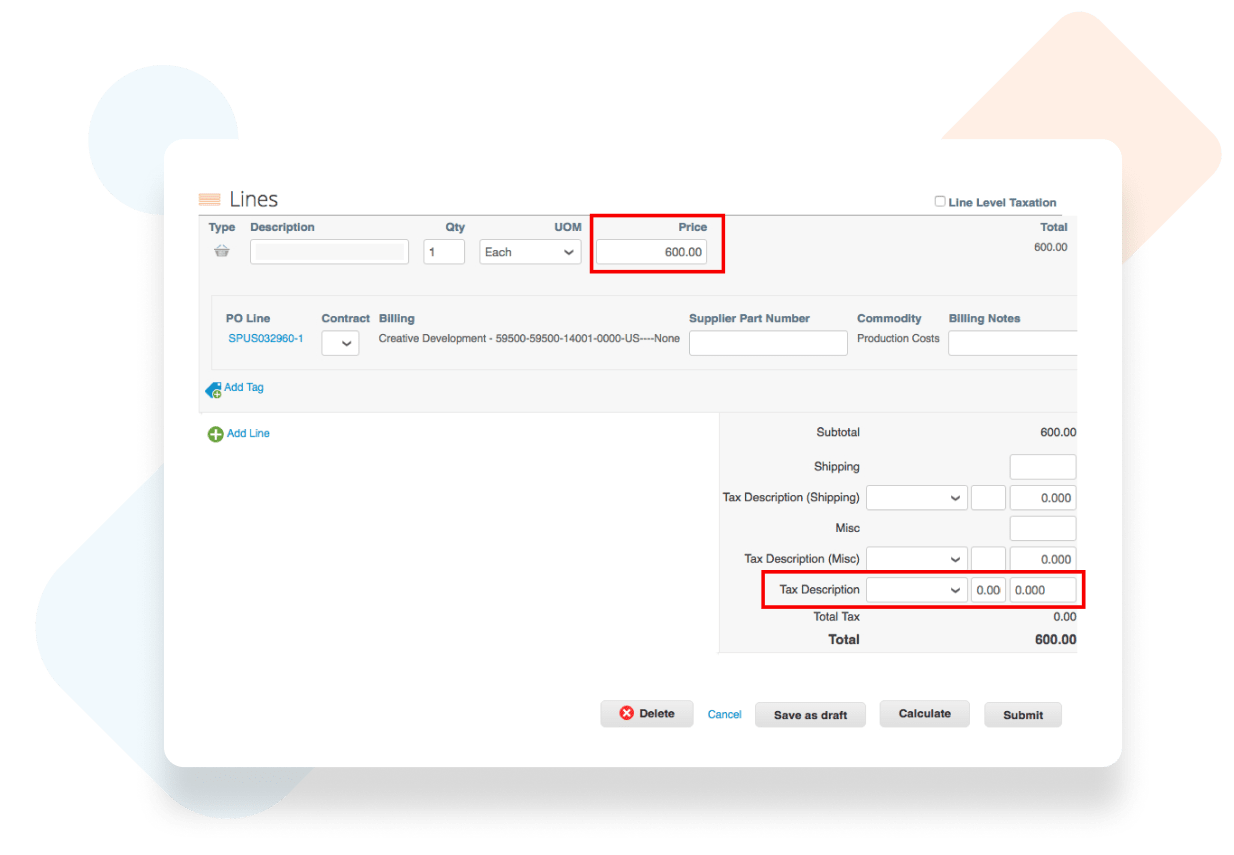
Input a Tax Description (TAX/VAT CODE)
Using Tax Description (Misc) will cause an error.
Once your invoice is complete you can “Save as Draft” to finish it later, or click “Submit”.
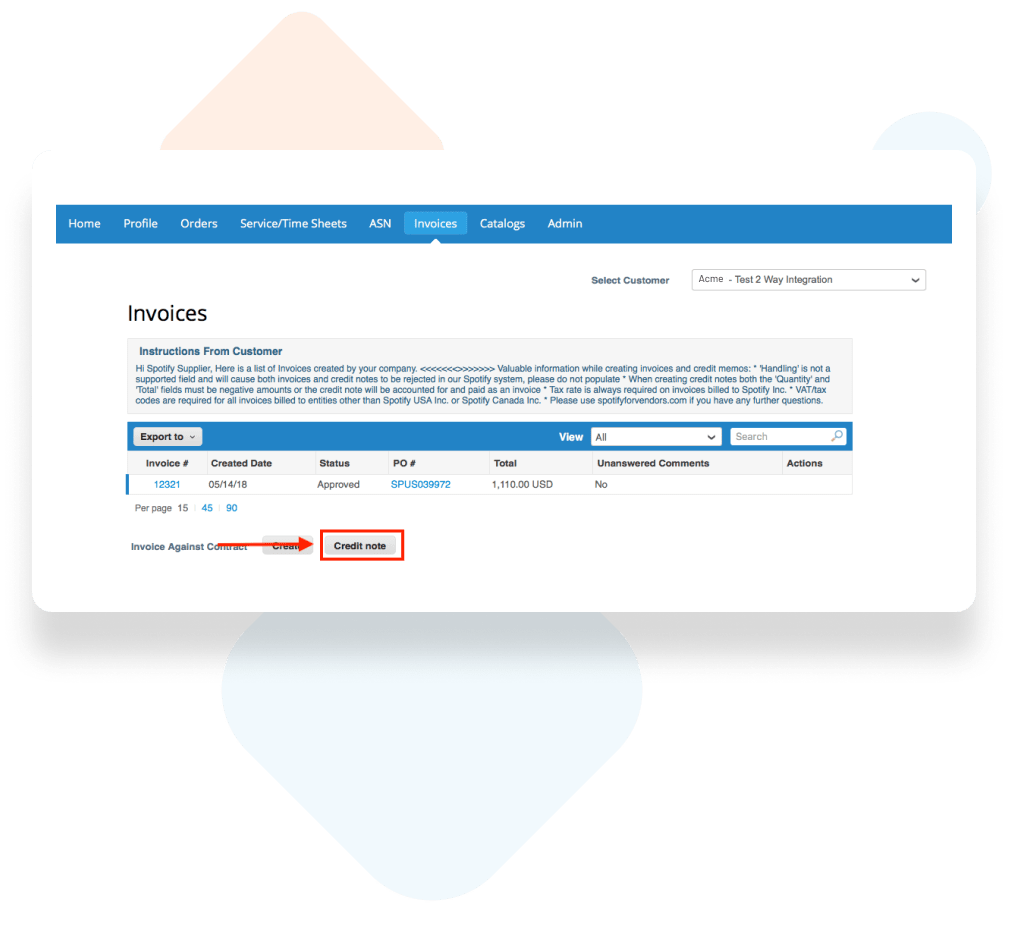
Credit Memos
Click that button and a screen will appear giving option to “Resolve issue for invoice number” with a dropdown of all applicable invoices.
Once you have selected the invoice to apply the credit note to, you will need to select if the credit memo is for the the full amount or partial amount of the invoice.
Coupa will redirect you to the Credit Notes page where you will need to enter the Credit Note number. If you have a PDF credit note, please attach it to the credit note.
Click submit, confirm the information, then click Send.